Trying to catch up while I wait for my engine compartment to be degreased and cleaned up - so I'll try not to let this awful Apple keyboard frustrate me to the point of quitting.
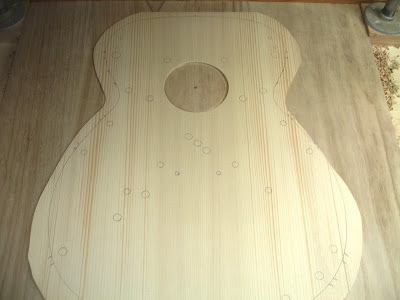
So last time I left you off was a set of red spruce braces prepped and ready for gluing. Before you can glue the braces on the soundboard your need to know where to glue to darn things first, right? You'll need a template to mark the back of the soundboard for brace placement. I bought a nice acrylic template with strategic holes that allowed me to mark my end points for each brace on the soundboard. You can also using tracing paper to do the same thing. Just trace the brace outlines from your plan on the sheet (be sure to include soundboard and sound hole center reference marks), do some fancy cutting with scissors or a razor, and you're ready to begin.
Now before you start making pencil marks willy nilly on the soundboard, you want to make sure your template is centered properly. You'll need two reference points: the center of the sound hole and the center joint of the soundboard. If you're using tracing paper, this is where your reference marks come in handy. Acrylic templates are likely easier to deal with because everything's already pre-marked and ready to go. Making your brace position marks is not necessarily rocket science, but I assume it helps when you're as exact as possible seeing as the soundboard is the most critical component to the overall sound producing capability of a guitar. And after your first try, if you find you're not completely satisfied with your marks, don't fret, erase as best as you can and try again.
Once you have the marks just right, then the fun and the terror begins - buahahhaaaahhh!
Oh, I thought you might like to know I updated the "Back to work" post with additional rosette pictures. I also added more recent pictures on my flickr site -- www.flickr.com/photos/vote_for_hoy/. You might want to check the post and the site out!


No comments:
Post a Comment