Haha, get the catchy title analogy?? You know, because we're talking about soundboard bracing next?!? Yaarrrr... I know my jokes are bad so I'll just stick with the guitar building. Having finished the rosette, my next step was to brace the top, coming one step closer to the point where I could finally assemble the body. The first step to bracing is, as with anything, preparation, and the largest part of preparation for bracing is, of course, making your braces.
Braces are typically made out of a soft wood and may or may not be matched with your soundboard material. It so happens that, more often than not, top braces are made out of Adirondack Spruce. While it's hard to find Adirondack billets large enough and clean enough to use for larger guitar tops, it's extremely easy to find suitable Adirondack stock ideal for braces. The stock doesn't need to be extremely even grained or especially large; it's fairly common to find pieces of adequate size to then reduce for your large and small braces.
All my braces came from one solid block; it's pretty simple to do, you just need to measure many times so you only have to cut once for each individual brace. I started with the easiest cuts and the largest on the soundboard, the x-braces. One important rule you need to remember, however, when cutting your braces is be sure to cut each brace with the grain in the proper orientation. I forget now exactly which direction is correct (I think you want the grain to run vertically but double check first). I made sure I cut the width of each brace as close to exact as possible, but I allowed a little extra height on them because I'd be carving them down to the proper size later. I also made sure I left plenty of length so that the tips would extend beyond the edge of the soundboard.
Once the x-braces were ripped with the table saw (watch your fingers), I proceeded to rip the rest of the braces to include the tall upper face brace, the sound hole braces, and all the remaining fan braces. Once they were are sized properly, I separated and labeled each brace. You can group braces into two broad categories - flat and curved. The flat braces are the easiest to glue, so all the books say to begin with them. I'm not one to trump age old wisdom so I reiterate, start with the flat braces first!
As far as creating curved braces goes, it's an art and not a science. There are a million ways to do it, but here's how I ended up doing it -- I marked the general outline of the desired curve on the side of the brace by drawing a curve from the center to a mark on each tip. Your plan will tell you what kind of curve you need - it's typically a difference of anywhere from 1/16th to an 1/8th from the center to the ends (I'm not sure how that relates to curve radii...). Once I had my lines I simply sanded the gluing faces to those curved lines as best as I could using a 6-inch belt sander (thanks Mom, Dad, Brother, and Sister for the awesome Christmas present!). I then hand sanded the curved braces to finish them off with a 150 grit block sander.
As I alluded to in the previous paragraph, the final step to preparation is to sand the gluing faces with 150 grit sand paper; this makes sure you have a good bonding surface. Well that's it for prep. Next time I'll go through the gluing and shaping process for flat and curved braces, and yes! I will make sure I include pictures. I apologize for the scarcity of photos; I know personally I'd have trouble maintaining interest were there few to no pictures included... Shame on me for being lazy.
Soundboard Construction

Adirondack Spruce - the redheaded stepchild of the Luthier world
Monday, January 31, 2011
Fuer meine deutsche Freunde dort drueben
Jo jo jo! Was ist los meine Kumpel?? Es ist scheiss kalt hier aber ich gehe nach San Diego naechste Woche. Es freut mich dass ihr schaut meinen Blog noch ab und zu an. Viel Spass und hoffentlich bin ich nicht schrecklich langweilig. Bis spaeter.
Sunday, January 30, 2011
Don't use a power drill when tired!
A word to the wise... don't use the cordless drill to drive 2 inch screws in unpiloted sturdy plywood. Take it from me, the drill will slip and you'll end up puncturing the finger you were using to steady the wood. And no, unlike bullet wounds, the entry hole is much worse than the exit hole. If I ever make it beyond the shock, I'll upload a picture of the aftermath...
here's the picture from my cell phone

here's the picture from my cell phone

Saturday, January 22, 2011
Back to work
If I have it correctly, I last left off at selecting the inlay materials and cutting them out. I'm not sure if I mentioned how difficult it can be to create sectioned inlay pieces or not. Well it is and it is primarily due to the pesky little seams. Now you can add a whole new dimension of complexity if your rosette jig is a little out of true, as mine is, which means some sections are wider than others. Now assuming all your rosette sections are the same width, you'd think that joining them to make a perfect circle would be easy right?? Think again! I'm a mechanical engineer with a masters degree (albeit a poor one) and I still got it wrong! It just goes to show a little experience, a little feel, and a little luck make a trifecta.
Once I got the entire rosette (the inner and outer rings of bubinga and the middle ring of spalted maple) ready for placement I then began experimenting with the same jig to get the cut depth and inner and outer dimensions correct. I made my practice rosette slot in a wide board of high grade pine to simulate the spruce. I made successively wider and narrower passes until I got the channel width just right and I made sure I marked those "precise" spots on the circle jig. After practicing placing the pieces a few times and triple checking the cutting depth of the jig, I carefully transitioned to the actual soundboard.
Once I had routed the channel in the soundboard, I checked it to make sure all the pieces fit. I found that it was just a little too tight and went back to widen it just a smidgen. When I was finally happy with everything, I labeled each piece in order, set them aside, and got the LMII instrument glue out. I made sure a thin layer of glue covered all surfaces of the rosette channel and then put each piece in. Once everything was in and properly positioned, I used go bars to apply pressure to every piece to make sure none popped out of place.


The real education came when I realized I had almost an eighth of an inch of hardwood that stood proud of a properly thinned soft spruce soundboard! Despite this being the standard way of doing things, I vowed next time I'd place and glue the rosette before I thinned the soundboard with the wide belt thickness sander. I tried hand sanding the rosette with a series of block sanders but found little success and a lot of frustration with how slow the process was. Enter the micro gouge! With this little Flexcut baby I could maintain the precise control I needed to save from destroying the soundboard itself while removing a lot of material in a short amount of time. If you have one, I highly recommend you try it.

Once I got most of the material removed and got close to the soundboard face, I switched back to sanding blocks with much more success. When everything was about flush I decided to fill in any small gaps with CA glue mixed with fine sanding dust. Once everything was dry again I finished the rosette off with a long, straight cabinet scraper, which worked wonders! Now my problem is, how to get that great edge back on the scraper...

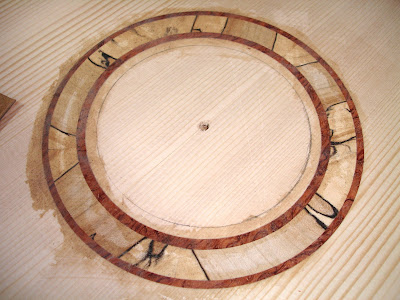
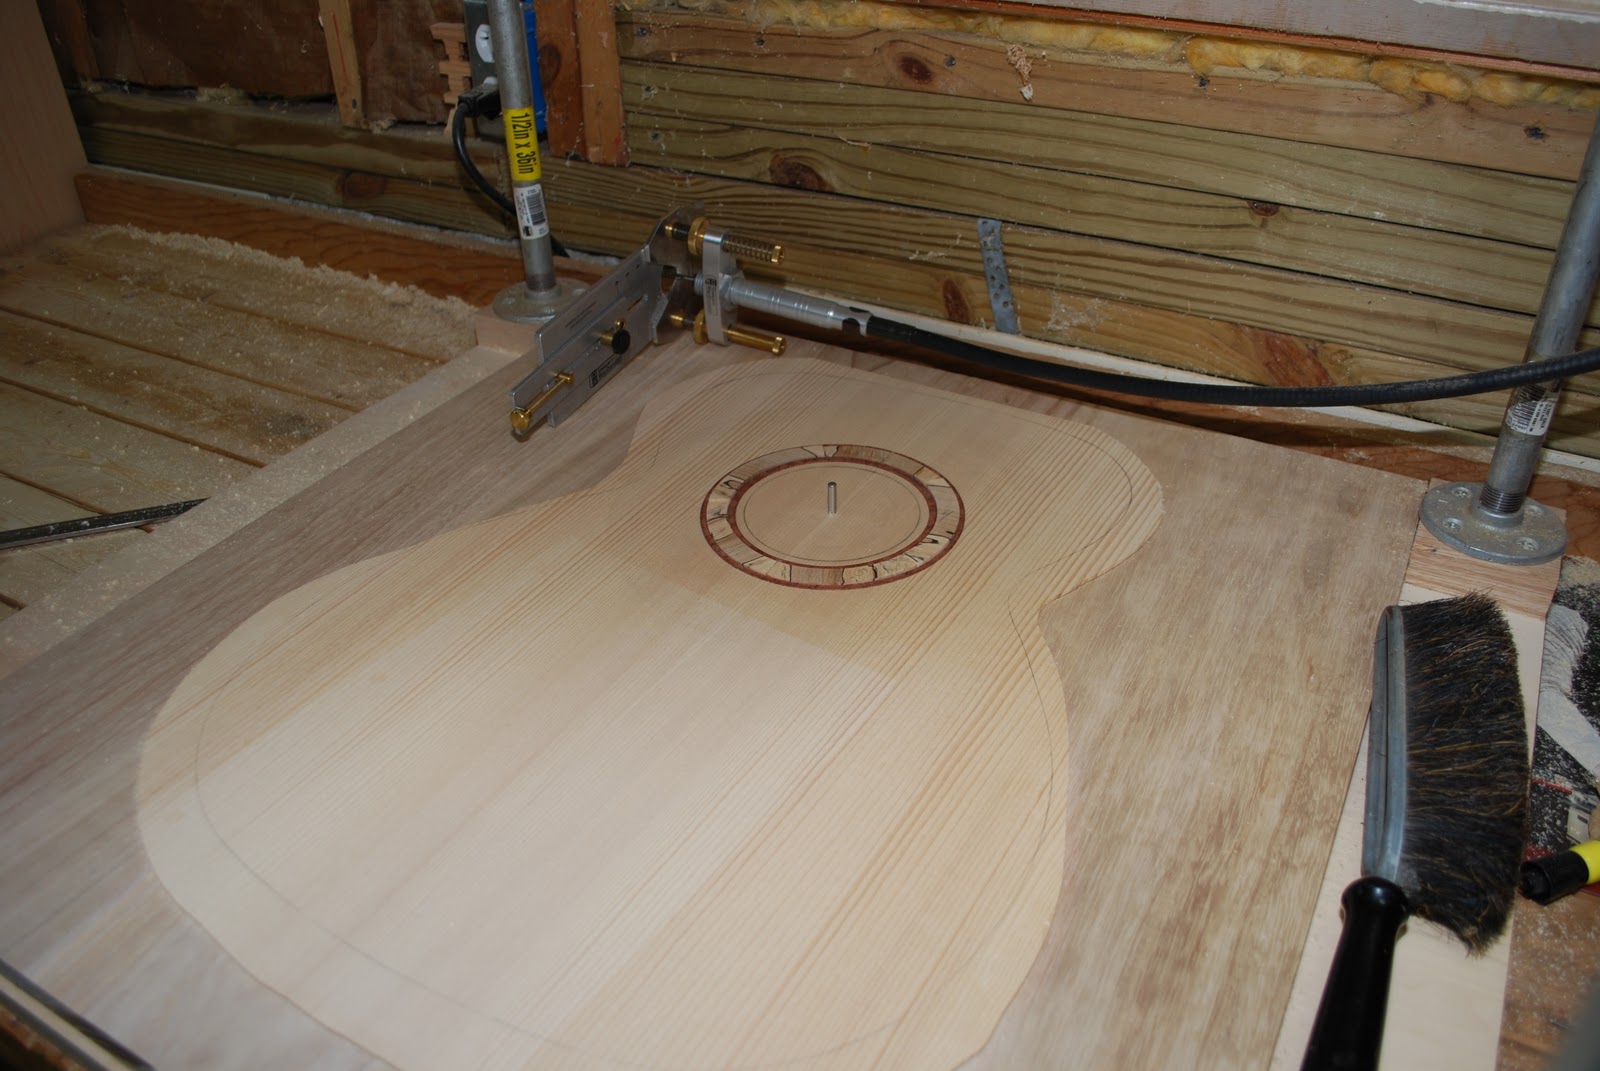
Anyway, the scraper finished it off beautifully and I closed the difficult chapter of rosette making by using the circle jig to cut the soundhole - oh what a sense of accomplishment! Unfortunately I don't have a final picture of the completed soundboard to show you but I'll post it later. Thanks for waiting so patiently for me to finish rosettes! Now we're on to sounboard bracing - yea!
And it's many many months later. Here's the completed rosette and soundhole (though I do recommend you wait to cut the soundhole until you've marked the back of the soundboard for your brace placements but before you actually start gluing anything!). I guess I should devote a short post strictly to cutting out the soundhole itself, but we'll save that for another day. If you're building your own guitar, good for you, and you'll figure it out -- I did...

I found that once I got the approximate section lengths close, I could use a good sanding block to slowly true all the sections up. It was slow and tedious and I'm certain there are a thousand better ways to do it, but at the time it was all I could go by. I'll let you in on a little secret I did learn though... you can make all the pain go away, well most of it anyway, by simply resigning yourself to leaving a gap at the top of your rosette with the intention of covering it over later with the fingerboard. Being a purist (or more aptly put - anal) I refused, but had my work taken just a few more hours, I would have succumbed to the easy method too.
Once I had routed the channel in the soundboard, I checked it to make sure all the pieces fit. I found that it was just a little too tight and went back to widen it just a smidgen. When I was finally happy with everything, I labeled each piece in order, set them aside, and got the LMII instrument glue out. I made sure a thin layer of glue covered all surfaces of the rosette channel and then put each piece in. Once everything was in and properly positioned, I used go bars to apply pressure to every piece to make sure none popped out of place.

The real education came when I realized I had almost an eighth of an inch of hardwood that stood proud of a properly thinned soft spruce soundboard! Despite this being the standard way of doing things, I vowed next time I'd place and glue the rosette before I thinned the soundboard with the wide belt thickness sander. I tried hand sanding the rosette with a series of block sanders but found little success and a lot of frustration with how slow the process was. Enter the micro gouge! With this little Flexcut baby I could maintain the precise control I needed to save from destroying the soundboard itself while removing a lot of material in a short amount of time. If you have one, I highly recommend you try it.

Once I got most of the material removed and got close to the soundboard face, I switched back to sanding blocks with much more success. When everything was about flush I decided to fill in any small gaps with CA glue mixed with fine sanding dust. Once everything was dry again I finished the rosette off with a long, straight cabinet scraper, which worked wonders! Now my problem is, how to get that great edge back on the scraper...


And it's many many months later. Here's the completed rosette and soundhole (though I do recommend you wait to cut the soundhole until you've marked the back of the soundboard for your brace placements but before you actually start gluing anything!). I guess I should devote a short post strictly to cutting out the soundhole itself, but we'll save that for another day. If you're building your own guitar, good for you, and you'll figure it out -- I did...

Thursday, January 6, 2011
Did I mention I love Brazil?
Obrigado para a leitura. Brasil é impressionante! There's nothing finer than the tonewoods that come from the vibrant, varied, and gorgeous country. I've never been there but I hope to visit someday. If you're curious about anything in particular, feel free to ask me a question in a comment! Adeus.
Tuesday, January 4, 2011
Getting back to rosettes
As I was saying, the first step to successful rosette making is the same with every step of guitar building - plan and take your time. You can go back to arguing the chicken or the egg all you want, but it really doesn't matter; if you already have your materials in mind, think of what design might work best with those materials. If on the only hand, like me, you have a design in mind, put it down on paper then go find the materials to match.
I, for some unknown reason, have a fascination - or perhaps a fixation - with spalted and ambrosia maple; I can't help it, to me it's God's gift to luthier-kind. It must have been ingrained in my psyche after all those hours of continuous searching on the internet for the most distinctive acoustic guitar traits. I think my record was 5 hours one late night until my eyes glazed over, rolled back into my head, and my wife found me the next morning keeled off my chair in a puddle of drool, twitching and muttering spalted maple, spalted maple... over and over again in my sleep.
Needless to say, the counseling helped but did not cure me of my spalted maple craze. So getting back to the real story, I looked online at a few places, finally found a mill in Maine that sold some decent sets of spalted maple, bought a couple sets and had the mill resaw the best set into 1/4 inch plates that could be easily utilized in the shallow rosette channel. Once I had the materials, my inspiration, in hand I began to draw a 1:1 mock-up of the rosette on paper.
I started by tracing the soundhole outline in the center, then played around with varying rosette widths and compositions. I ended up deciding to keep it simple on the first go around - center spalted maple ring about 1/2" or 5/8" in width surrounded by thin 3/16" curly bubinga border rings.
Next I carefully drew the desired circles for each wood plate using a vintage compass. The bubinga was easier because, after jointing and joining two smaller book matched plates together, I could simple scribe the inner and outer rings I wanted and cut them out from the same plate. Word to the wise, when doing something similar, start from the outer most edge and work your way in on subsequently smaller diameters. Otherwise you'll find you need to do some special engineering if you start from the inside and work out!
The spalted maple pieces were much more tricky. For the center ring, I wanted to get a lot of figuring in that little space. You're liable to win the lottery before you find the perfect piece of spalted maple for such a task, so what I've seen done on a number of examples, is to cut out several smaller sections from highly figured areas in the proper curvature, then joint them together. You can make it obvious or subtle, either way works. I can't say which exactly mine ended up being but it's probably on the subtle side.
To do all the cutting I used a StewMac Foredom tool jig used to make precision small circular cuts. It worked well once I figured out how tight I needed to keep all of the nuts and screws on the thing when cutting through hardwood. All the vibration would loosen everything up until I was completely out of alignment. Good thing I learned all this on practice pieces, something I highly recommend you do for rosette making.
Once I had all the pieces routed with the Foredom jig and a down-cut spiral bit, it was time to rout the lay-up board which would be used to fine tune the pieces in preparation for the harrowing process of routing your precious soundboard. Unfortunately, I still haven't gotten to the bottom of finishing off the rosette. One more post ought to do it. I apologize for the lack of pictures, but I think all of the pictures I have can be seen on the slide show below which links to my Flikr site. I'll be sure to put some nice shots in my last post on completing the rosette. Until then!
Subscribe to:
Posts (Atom)