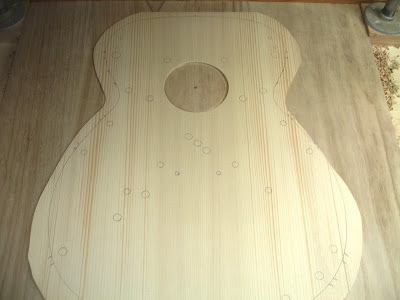
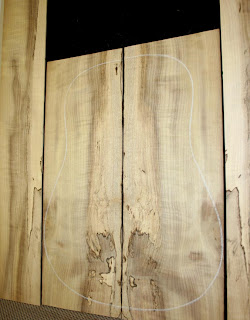
Bear with me I'm going to side track for just a second away from soundboard bracing to tell you about my latest breakthrough - a successful back strip step. Don't worry I'll get back to soundboards, but first let me walk you through the back strip since it's fresh. You can see all the pictures at www.flickr.com/photos/vote_for_hoy/, and clicking the little slide show at the bottom of the page should take you there too.
I started with my jointed, joined, and thinned walnut back. I traced a center line down the seam then followed it with a line on either side of the center spaced to the width of the back strip I had set aside. You can buy pre-made and pre-dimensioned back strips but I wanted to personalize my dad's guitar with spalted maple, tying it in with the custom rosette I had made for the soundboard. It took me a couple of tries to get the back strip right (spalted maple typically isn't a high quality wood - the fungus tends to break down the structural integrity of the maple). I ended up with a back strip about 3/8" wide and about 1/16" to 3/32" thick with less spalting than desired to keep it strong but enough to get the effect. Side note - it's really tough figuring out how to plane or sand a piece of wood that thin and frail!
Above you can just barely see my three lines. To set up my poor man's router jig (a clamped square), I carefully measured the distance from the cutting edge of the router bit to the edge of the router base and clamped the square to the workbench accordingly. Before you make your first cut, remember to adjust your cutting depth to no more than half the thickness of the back itself; and for Pete's sake, test it on scrap wood before you go tearing up your intended piece.
Once I made my first pass along the left edge of the back strip channel, I measured the remaining width I had to cut in the channel and moved my square that distance to the right to finish off the right side of the channel. Make sure you take your time measuring and positioning your jig, there is a lot of room for errors which could force you to find alternative back strips or even ruin your back altogether. You can see the first pass and a close up of the finished channel below.
Alright peeps, it's getting late and I need my beauty sleep so I'll finish this up tomorrow or the next day.
Peace!
A blog dedicated to the steps and missteps of building an acoustic guitar. Join me as I hack, splinter, jam, bruise, and bleed my way to building a modified Martin-style 14-fret 000 guitar as a gift for my half-deaf father.
Soundboard Construction
Adirondack Spruce - the redheaded stepchild of the Luthier world
Tuesday, June 28, 2011
Monday, June 27, 2011
"Targeted" Advertising
You gotta love targeted advertising... My most recent post on bracing caused Google or Amazon to put up a targeted ad for colorful neck braces! I certainly think those in the unfortunate situation of needing such a device would be happy to find such a wide ranging selection, but I think their automated code monkeys may have misjudged the content of the posting. Thought it was amusing. Anyway, stay tuned for a short post on back strips - I just finished ours over the weekend!
Wednesday, June 22, 2011
Gluing and Shaping Braces
Trying to catch up while I wait for my engine compartment to be degreased and cleaned up - so I'll try not to let this awful Apple keyboard frustrate me to the point of quitting.
So last time I left you off was a set of red spruce braces prepped and ready for gluing. Before you can glue the braces on the soundboard your need to know where to glue to darn things first, right? You'll need a template to mark the back of the soundboard for brace placement. I bought a nice acrylic template with strategic holes that allowed me to mark my end points for each brace on the soundboard. You can also using tracing paper to do the same thing. Just trace the brace outlines from your plan on the sheet (be sure to include soundboard and sound hole center reference marks), do some fancy cutting with scissors or a razor, and you're ready to begin.
Now before you start making pencil marks willy nilly on the soundboard, you want to make sure your template is centered properly. You'll need two reference points: the center of the sound hole and the center joint of the soundboard. If you're using tracing paper, this is where your reference marks come in handy. Acrylic templates are likely easier to deal with because everything's already pre-marked and ready to go. Making your brace position marks is not necessarily rocket science, but I assume it helps when you're as exact as possible seeing as the soundboard is the most critical component to the overall sound producing capability of a guitar. And after your first try, if you find you're not completely satisfied with your marks, don't fret, erase as best as you can and try again.
Once you have the marks just right, then the fun and the terror begins - buahahhaaaahhh!
Oh, I thought you might like to know I updated the "Back to work" post with additional rosette pictures. I also added more recent pictures on my flickr site -- www.flickr.com/photos/vote_for_hoy/. You might want to check the post and the site out!
Tuesday, June 21, 2011
Official Verdani Email
Also readers, if you want to get a hold of me or my not-yet-realized company you can now reach me at my official email -- verdaniguitars@gmail.com
New Material -- Happy Father's Day me!!
I just happened to stumble across and incredible back and sides set of spalted myrtle. It was just too gorgeous and rare to pass up. I ostensibly needed some new head plates since I mistakenly destroyed the original rosewood piece to make a bridge backing for the soundboard - Oops... Well providence shone through, and now I have a couple new rosewood head plates thrown in with the myrtle set, compliments of Steve from Colonial Tonewoods!
Also, later this summer I'll be starting the transformation of my car port into the worlds greatest home lutherie shop. I'll be sure to include updates and pics of that too!
Catch everyone later.
Also, later this summer I'll be starting the transformation of my car port into the worlds greatest home lutherie shop. I'll be sure to include updates and pics of that too!
Catch everyone later.
Subscribe to:
Posts (Atom)


